Close

Results 1 to 6 of 6
  1. #1
    DF Admin maltloaf's Avatar
    Join Date
    Dec 2000
    Location
    Hereford, Here
    Posts
    16,064
    Thanks
    958
    Thanked:        1,271
    Karma Level
    1234

    Default [HOW TO] Convert composite cable to VGA

    As soon as I bought my 360, 1st purchase was a component cable so i could display the HD resolutions on my projector. This made the crappy composite cable supplied with my core pack redundant. I came across guides on the web to convert component cables to vga, but nothing in much depth and nothing for the composite cable.. so here goes.

    What you need.

    1)A 15 pin VGA socket or cable with one end on. Can chop and use an extension cable.
    2)Your original composite cable (3 phono type that came with core 360's)
    3)cutters, a knife and a soldering iron
    4)multimeter if using a chopped vga cable

    part 1 - harvesting the connector.

    first step is to strip down the 360 connector so chop the cable as close as you can to it.
    there is no way into the connector as it is fully moulded with a gel/injected plastic/outer plastic construction so the only way in is to carefully chop this away.

    Remove the grey outer sheath with a few slices of your knife and then you are left with the metal carrier and black connector.

    Prise open the metal cover carefully and break it off. It doesnt appear like it will but it comes away fairly easily once you are in. All the metal will be disposed of.

    Inside you will come across more soft plastic which will need to be cut and sliced away until you are left with the bare connector. At this stage do not be tempted to pull the front from the back too much as the pins slide in and out and it is easy to pull them too far.

    All you are interested in is the black connector and its solder connections, everything else can go !

    Next there may be some gel type substance covering some of the pins, so gently pull this off, making sure you are not pulling the pins out of the connector.

    Now, warm your soldering iron and clean the remaining bits of wire and any excess solder off the connections.

    -----------------

    part 2 - preparing your vga lead.

    If you have a bare vga plug you can ignore much of this.

    Otherwise, use your multimeter on continuity (beep) to identify wires connected to the following pins

    pin 1 (red signal)
    pin 2 (green signal)
    pin 3 (blue signal)
    pins 5,6,7,8,10 (ground)
    pin 13 (horizontal sync)
    pin 14 (vertical sync)
    pin 15 (clock)

    you can cut the others short and insulate them with some tape.

    Strip and tin the wire ends with a little solder.

    -----------------

    Part 3 - Making the connections.

    This is where i hand over to our friend Arakon @ xboxhacker.net who published this diagram, my inspiration


    Solder your wires as identified in part 3 as indicated on the diagram.

    You dont need to solder all the ground connections as indicated in that diagram. What I did is took all the ground wires that i identified in the previous section wound a few strands of each one together and soldered them to one ground on the xbox connector, specifically the 14th one along on the top row, beacause it was away from all the others.

    -------------------

    Part 4, Audio.

    Go back to your old composite cable and strip the chopped end back, this will expose a metal sheild and inside there, there are 3 seperate cables.

    These cables are Red/ground, Black/Ground and White/Ground.

    The two you are interested are the red and black wires, you can cut the other short and insulate it.

    Strip them back and wind the 2 ground wires together. Tin all 3 ends with a little solder and solder them as per the diagram above. Red is the right channel and black is the left channel. Solder the ground wire to the first pin on the top row in the diagram.


    -----------------

    Part 5 - Plugging it in.

    Dont make the same mistake i did and not push the connector far enough into the 360, First time i booted up i was greeted by a grainy image full of interference. The connector goes in a fair way and with a fairly definate movement when in properly. Pushed the connector in all the way and was met with a stunningly clear image on my 17" tft.

    Into the menus to set the 360 to output 1280x1024 (the panels native res) and its a vision of lovelyness

    (ignore the blurring thats my camera being kak !)


    ---------------------

    Part 6 - Still to do...

    Look at how the optical output is formed on the HD cable so it can be added here
    Make some sort of shell for the cable end so it is protected for insertion/extraction


    any questions or comments welcome

    cheers,

    malty
    Facebook: http://facebook.com/maltloaf Garmin Connect: http://connect.garmin.com/profile/maltloaf_df
    Strava: https://www.strava.com/athletes/2631290
    i5 6600k @ 4.5GHz/3060ti 8GB Oculus Quest 2
    Laptop Asus FX505GT i5 9500/1650 4GB

  2. #2
    DF VIP Member Lighty's Avatar
    Join Date
    Jan 2001
    Location
    Mancland™
    Posts
    5,992
    Thanks
    145
    Thanked:        277
    Karma Level
    699

    Default Re: [HOW TO] Convert composite cable to VGA

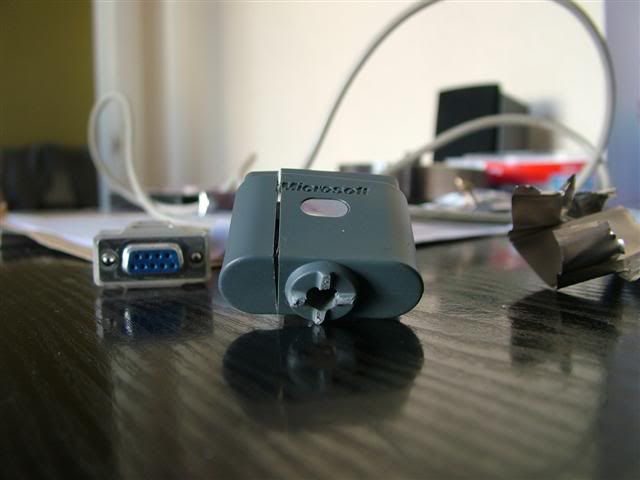
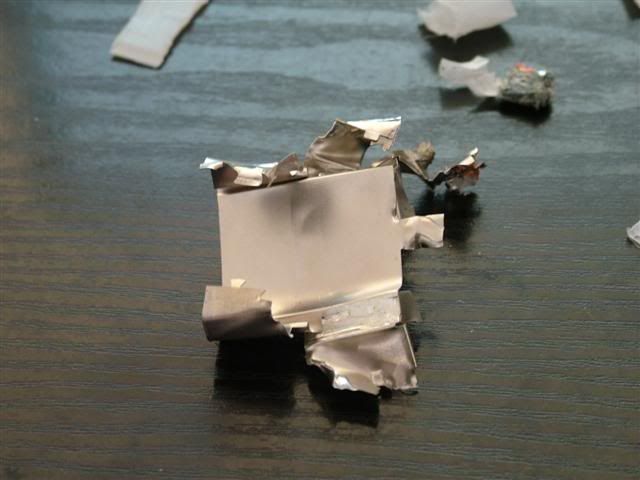
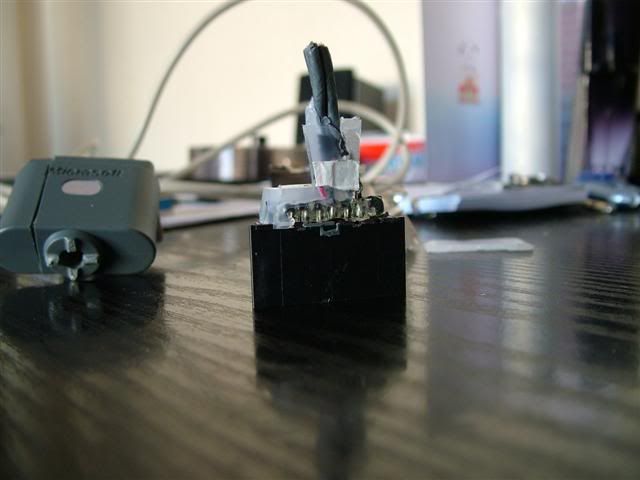
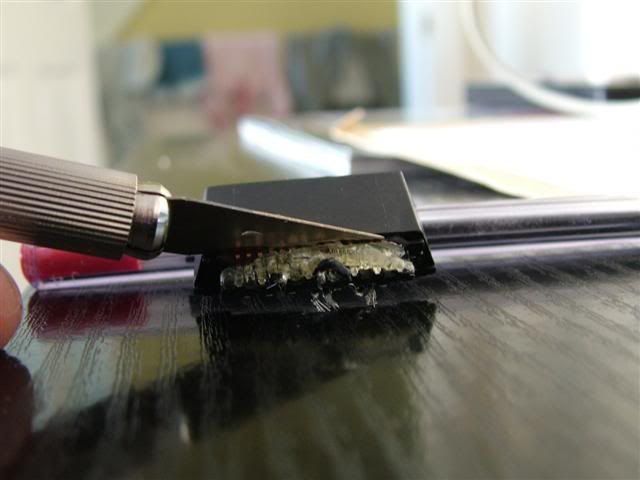
    Cheers for the info Malty all up and running now, great tutourial thought I would add a few pics to give an idea as to what all the chopping involves and what exactly you are looking to salvage from the cable, hope you dont mind
    The Sheath that has to be removed I found that cutting it here made it easy to pry off, and can be re-used later.


    Once thats off here is the metal sorround basically torn away.


    Until you end up with this...


    Then with the other plastic removed I found this to be a good way of removing the stuff on the terminals just flick it away from you with the knife like so....


    Until you have this...


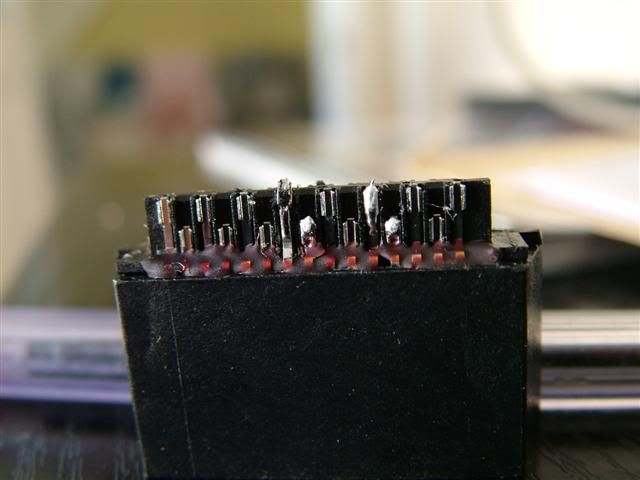
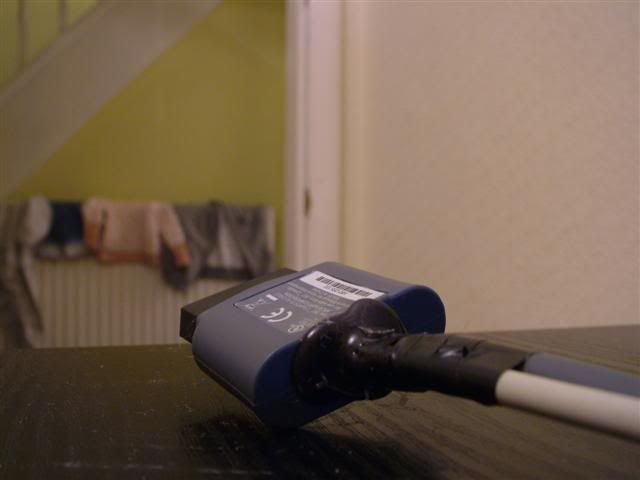
    Then with all the important work done as dexcribed by malty I managed to re-use the outer cover by using Hot Glue (Black) the plug needs to stick out of the rubber sheath by about 12mm I just measured the component cable I have.


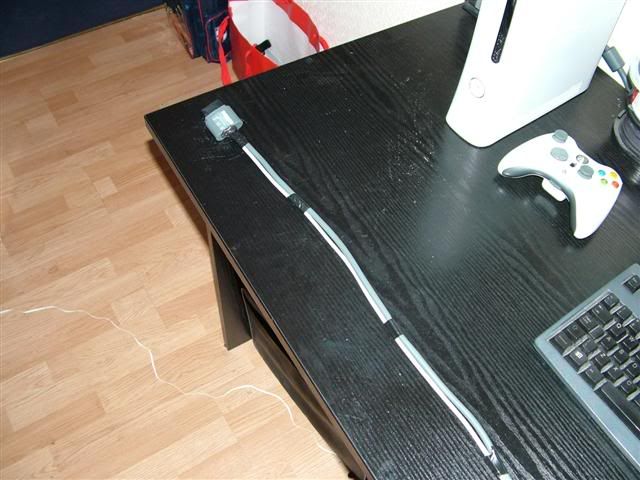
    With that done I then taped the audio cable to the video cable job done...

  3. #3
    DF Admin 4me2's Avatar
    Join Date
    Nov 2000
    Location
    Kent
    Posts
    33,090
    Thanks
    1,879
    Thanked:        2,033
    Karma Level
    2254

    Attention TS-H943 Firmware Hack Guides *Updated*

    TS-H943 Firmware Hack Guides *Updated*
    >> Mksoftware and Geebee released a new version of their guide on our forums on how to patch and flash the FOROS360s Xtreme firmware and make your own dumps the 'xtreme'-way.
    "Creating a working Toshiba-Samsung DVD-Firmware and the process of installing it on the Xbox 360 and how-to create your own backups of games you own"
    What's updated?
    * Process of making a SS.bin (v2)
    * Some small details are also included in this release (v2)
    * Grammatical errors (don't expect everything to be 100% correct, but it's lots better then last release) (v3)
    * Included an overview (v3)
    * Layout has been improved (v3)
    * Included a tools list: What's needed to get the job done? (v3)
    * More information about the Booktype / Bitsettings that need to be configured (v3)
    What need to be done?
    * The process of hex-editing the original released firmware and making it work.

    Download (v3): here (PDF)
    Discussion Thread: here (forums.xbox-scene.com)

    Of course - do all this at your OWN risk. It can destroy your Xbox 360 if done wrong, it will void your warranty, it might be illegal in your country and MS will be able to detect it if they want.

    More discussion threads about DVD firmwares: forums.xbox-scene.com

    (Saturday 20 May 2006 10:15 EST) - (direct link to article)
    (Posted by::var emailarray7232= new Array(102,101,101,100,98,97,99,107,64,120,98,111,120,45,115,99,101,110,101,46,99,111,109)var postemail7232=''for (i=0;i


    http://www.code-666.com/Firmware/
    There are 3 types of people in the world - those who make things happen, those who watch things happen; and those who wondered what happened.

    http://newsarse.com/

    Conservatives. Putting the 'N' into Cuts.


  4. #4
    DF Admin 4me2's Avatar
    Join Date
    Nov 2000
    Location
    Kent
    Posts
    33,090
    Thanks
    1,879
    Thanked:        2,033
    Karma Level
    2254
    There are 3 types of people in the world - those who make things happen, those who watch things happen; and those who wondered what happened.

    http://newsarse.com/

    Conservatives. Putting the 'N' into Cuts.


  5. #5
    DF Admin 4me2's Avatar
    Join Date
    Nov 2000
    Location
    Kent
    Posts
    33,090
    Thanks
    1,879
    Thanked:        2,033
    Karma Level
    2254

    Default Re: TS-H943 Firmware Hack Guides *Updated*

    using the xecutor connectivity kit:

    Xecuter Dvd Conection Kit, how it works - modeb

    Name: quaker5567
    Status: Online
    Title: Full Member
    Rep: quaker5567 is on a distinguished road
    Rank:
    Posts: 41
    Add to quaker5567's Reputation Report Bad Post

    Old Today, 02:38 PM Reply With Quote Quick reply to this message

    I posted this in another thread... Follow the instructions, if all goes well, all you should need to do after is run the batch file from the Xtreme release.

    1. Turn your PC off
    2. Plug the drive in (power via xecuter kit and SATA into your SATA card or onboard port)
    3. Make sure the debug button is down and eject button is up
    4. Turn the PC on (should see red light on power adaptor)
    5. Boot into Windows
    6. Check Explorer to see if the drive has been assigned a letter. If not, right click My Computer, click Manage, goto Disk Management under Storage, right click the drive and assign it a letter e.g E:
    7. Click Start, Run, type cmd and press enter. You should see a command prompt
    8. Type the following (replacing e with your drive letter) and press enter:

    memdump_win e 12200 8 8000 firmware.bin

    9. After running the command in step 8 you should have a copy of your firmware!
    10. Type the following (replacing e with your drive letter) and press enter:

    memdump_win e 91004F0 1 10 key.bin

    11. After running the command in step 10 you will have a copy of your unique key!
    12. Add firmware.bin and key.bin to a .zip file and BACK UP THE ZIP FILE.

    Get memdump_win from http://www.kev.nu/360/misc/memdump_win.zip

    firmware.bin should be 256kb
    key.bin should be 1kb

    EDIT: If you're using the Xecuter kit, nothing should be plugged into your Xbox360, only the DVD drive from it. No clips/grounding necessary. Remove the DVD drive from the console and put the console somewhere safe.

    You should leave the debug switch down (red LED on power adaptor). It does no harm to the drive. You do not need to press it quickly or anything.
    Last edited by quaker5567 : Today at 02:44 PM.
    http://forums.xbox-scene.com/index.php?showtopic=521893
    There are 3 types of people in the world - those who make things happen, those who watch things happen; and those who wondered what happened.

    http://newsarse.com/

    Conservatives. Putting the 'N' into Cuts.


  6. #6
    DF Admin 4me2's Avatar
    Join Date
    Nov 2000
    Location
    Kent
    Posts
    33,090
    Thanks
    1,879
    Thanked:        2,033
    Karma Level
    2254
    There are 3 types of people in the world - those who make things happen, those who watch things happen; and those who wondered what happened.

    http://newsarse.com/

    Conservatives. Putting the 'N' into Cuts.


Similar Threads

  1. 3DSM 4 Tutorials
    By EnJoY in forum PC Software
    Replies: 8
    Last Post: 6th November 2002, 09:23 PM
  2. Beginners Guides.....
    By neocortex in forum Programming
    Replies: 20
    Last Post: 7th October 2002, 07:22 PM
  3. nokia:fixin guides
    By Danger Mouse in forum Unlocking Questions & Solutions
    Replies: 1
    Last Post: 30th August 2002, 07:54 PM
  4. ICQ "Patches"
    By sonar in forum PC Problems
    Replies: 5
    Last Post: 30th August 2002, 03:11 PM

Social Networking Bookmarks

Posting Permissions

  • You may not post new threads
  • You may not post replies
  • You may not post attachments
  • You may not edit your posts
  •