1. Right click on the Desktop and click on
New and
Folder, then rename the new folder
Drives and press Enter.
NOTE: You can rename the folder anything you like. I'm just using Drives as an example in this tutorial.
2. Open the Computer window (Start Menu), then right click on any drive (ex: C: drive) that you want to pin to the taskbar and click on Create shortcut. This will create a shortcut for this drive on your desktop. (see screenshot below)
NOTE: You can create a shortcut for one or more drives if you like to use in step 3 below to pin them all to the taskbar as well.
3. Select and
Move all drive shortcuts on the desktop created in step 2 into the
Drives folder (step 1).
4. Now
Move the
Drives folder to a location (ex: in My Documents folder) that you want to keep it saved at.
NOTE: The Drives folder must remain at this location for it to continue to work when finished pinning it to the taskbar.
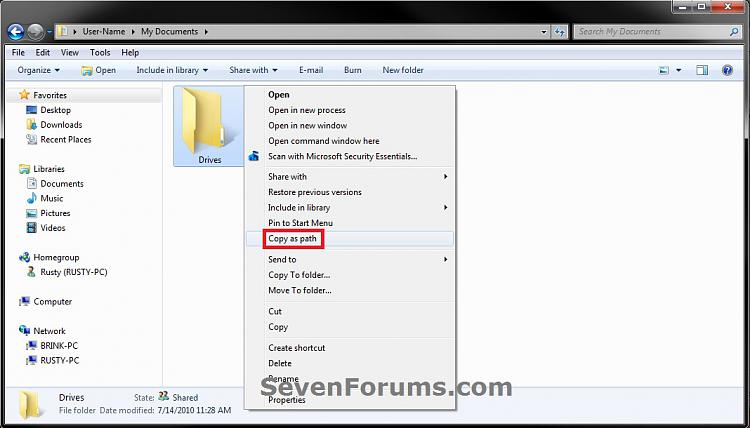
5. Press and hold the
Shift key, right click on the
Drives folder (step 4), release
Shift, and click on
Copy as path.
NOTE: This path will be used in step below.
6. Unlock the taskbar.
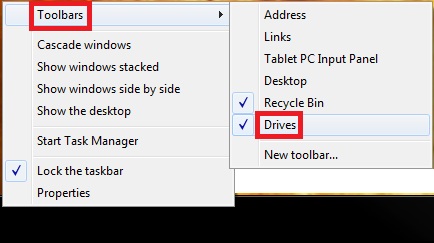
7. Right click on a empty space on the taskbar and click on
Toolbars and
New toolbar. (see screenshot below)
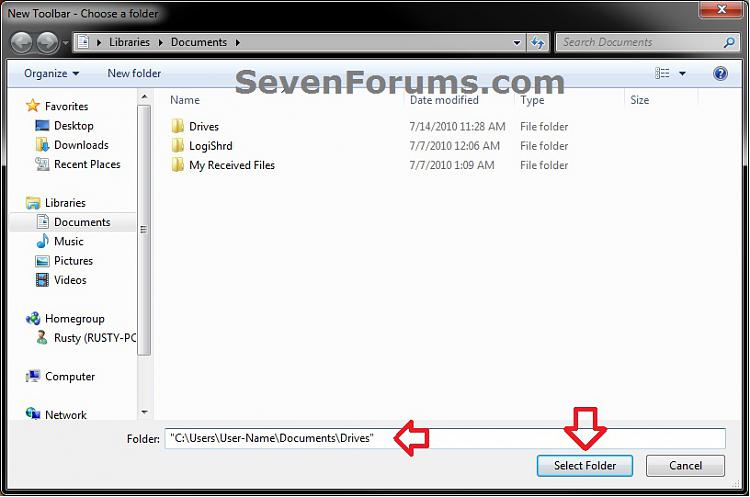
8. Right click in the
Folder line and click on
Paste to copy the path of the
Drives folder from step 5, then click on
Select Folder. (see screenshots below)
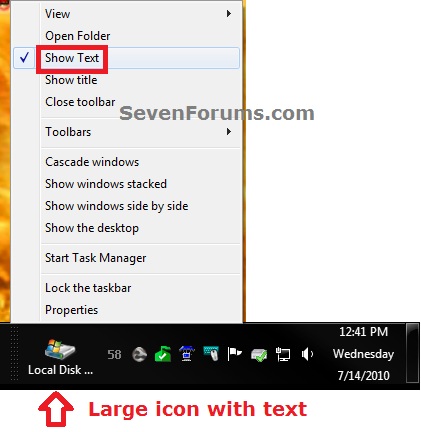
9. On the taskbar, right click on the
dotted lines just to the left of the
Drives toolbar icon, then uncheck
Show Title by clicking on it. (see screenshot below)
10. To Select a Small or Large Pinned Drive IconA) Right click on the
dotted lines just to the left of the drive, then click on
View and select either
Large Icons or
Small Icons for the drive(s) on the taskbar. (see screenshots below)
A) Right click on the
dotted lines just to the left of the drive, then click on
View and click on
Show Text to check (keep) or uncheck (remove) the drive name. (see screenshots below)
A) Left click on the
dotted lines just to the left of the drive and hold, then drag it to the left and right some to make any adjustments to how you want the drive(s) positioned on the right side of the taskbar. (see screenshot below)
B) Release the left click when done.
C) Go to step 14.
A) Left click on the
dotted lines just to the left of the drive and hold, then drag it all the way to the left past the other
pinned taskbar program icons on the left side of the taskbar and release. (see screenshot below)
B) Left click on the
dotted lines just to the left of the
pinned taskbar program icons on the now right side and hold, then drag it to the left until next to the drive and release. (see screenshots below)
NOTE: If you have another pinned toolbar on the left (ex: Recycle Bin) that you would like to keep to the far left instead of the pinned Drive icon, then you can drag the drive icon just to the right of it as well if you like.
.
15. You now have a pinned drive on the taskbar. (see example screenshot at the top of the tutorial)


Information


 Reply With Quote


Social Networking Bookmarks