How to Enable or Disable Windows 7 System Restore
Information
This will show you how to enable or disable System Restore for all users in Windows 7.
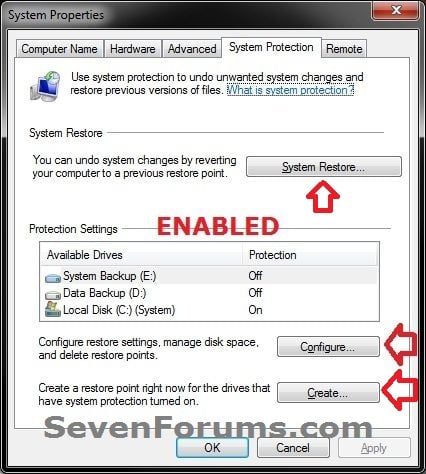
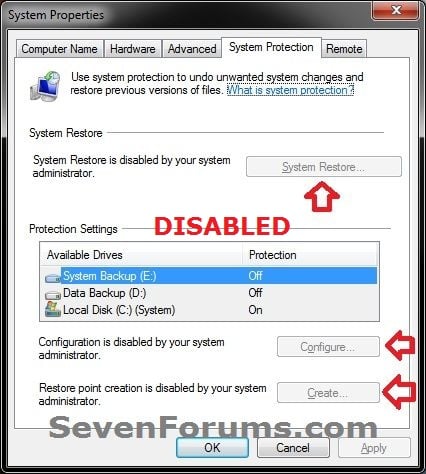
System Restore is enabled by default in Windows 7. If this is disabled, System Restore is turned off, and the System Restore Wizard cannot be accessed. The option to configure System Restore or create a restore point through System Protection is also disabled and grayed out.
EXAMPLE: System Restore Enabled and Disabled
OPTION ONE
Through a REG File Download
1. To Enable System Restore -A) Click on the Download button below to download the
Enable_System_Restore.reg file below.2. To Disable System Restore -A) Click on the Download button below to download the3. Click on Save, and save the .reg file to the desktop.
Disable_System_Restore.reg file below.
4. Right click the downloaded .reg file on the Desktop and click on Merge.
5. Click on Run, Yes, Yes, and OK when prompted.
6. When done, you can delete the downloaded .reg file on the desktop if you like.
OPTION TWO
Through the Local Group Policy Editor
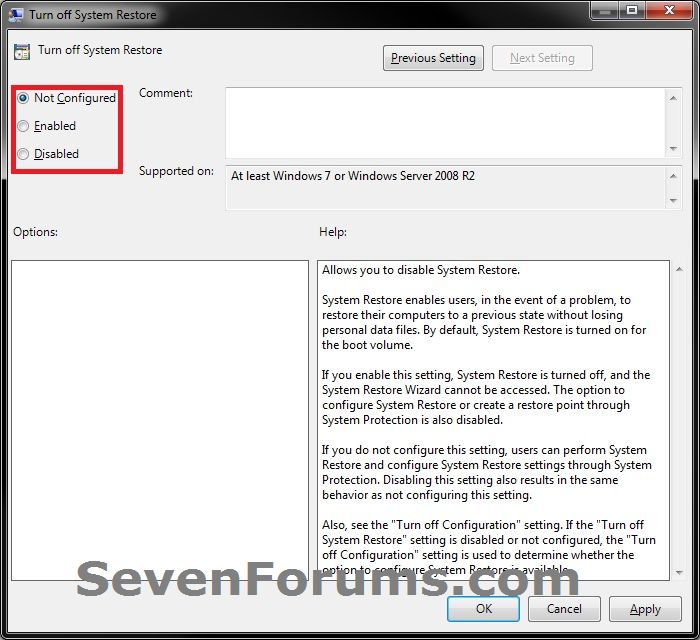
1. Open the Local Group Policy Editor.2. In the left pane, click on to expand Computer Configuration, Administrative Templates, System, and System Restore. (see screenshot below)3. In the right pane, right click on Turn off System Restore and click on Edit. (see screenshot above)That's it,
4. To Enable System Restore -A) Select (dot) either Not Configured or Disabled. (see screenshot below step 6)B) Go to step 6.5. To Disable System Restore -A) Select (dot) Enabled. (see screenshot below step 6)6. Click on OK. (see screenshot below)7. Close the Local Group Policy Editor window.
Shawn
Related Tutorials
- How to Enable or Disable Windows 7 System Restore Configuration
- How to Do a System Restore in Windows 7
- How to Turn System Protection On or Off in Windows 7
- How to Change the System Protection Disk Space Usage in Window 7
- How to Delete System Protection Restore Points in Windows 7
- How to Create a Windows 7 System Protection Properties Shortcut
- System Restore General Troubleshooting to Fix Issues
- How to Make a Create System Restore Point Shortcut in Windows 7
- How to Create a System Restore Point in Windows 7
- How to Automatically Create A System Restore Point at Startup
Attached Thumbnails


Attached FilesEnable_System_Restore.reg (266 Bytes)
Disable_System_Restore.reg (292 Bytes)


 Reply With Quote


Social Networking Bookmarks